Posts from the ‘create’ category

Ann-Maire Loves Paper | Save the Dates

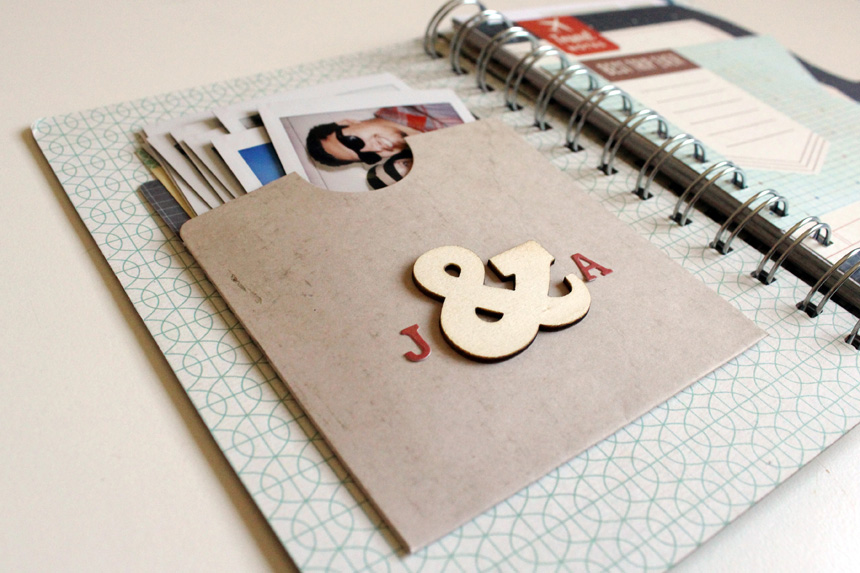
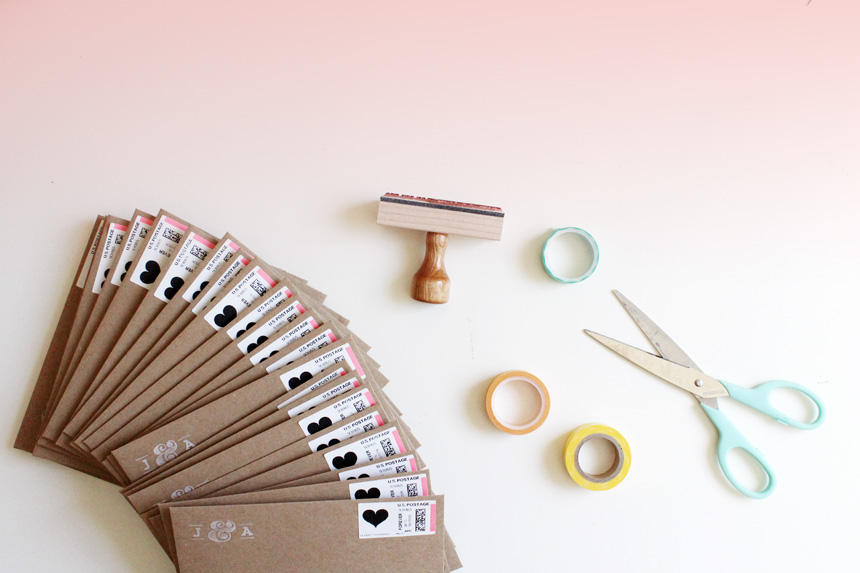
I will admit that John and I agonized over what to do for our Save the Dates. As two graphic designers with very different styles, meeting in the middle proved to be a tad tricker than we both anticipated. It’s one thing to collaborate with co-workers and professionally find middle ground. It’s another thing to be engaged to your fellow designer and attempt to have constructive critiques without making the other person mad (“whatever you want” translates into “that might be your worst idea of all time.”) But somehow, someway, we did it! We tag-teamed the assembly efforts and shipped them off to our guests last night with four months to spare. Despite my concern that we may have missed the mailing window of opportunity, the latest issue of Martha Stewart Weddings assured me that we are right on track. HALLELUJAH.

I can’t wait to share photos of the actual Save the Dates once they reach our guests! Stay tuned…

2 Comments

Hello everyone! My apologies for the radio silence…life has been all sorts of crazy lately, but I am determined to get back on track! ANYWAYS. Remember back in January when I talked about wanting a smaller format for my everyday memory-keeping? Well, I think I may have found the perfect solution: BasicGrey’s Capture albums. Not only are they the perfect size (6.5 x 9.5″), but they are so well-designed that it’s super easy to crank through them quickly (take my word on this…I’ve made six albums and counting for CHA over the past two weeks…!). I’ve decided to designate this particular album as my “week at a glance” book for the summer. Even though I don’t like too many rules, making weekly spreads is a breeze with this format, I promise!. And thank goodness for that, because let’s be real, I’ve got work to do and a wedding to plan! #realtalk

Ann-Marie Morris

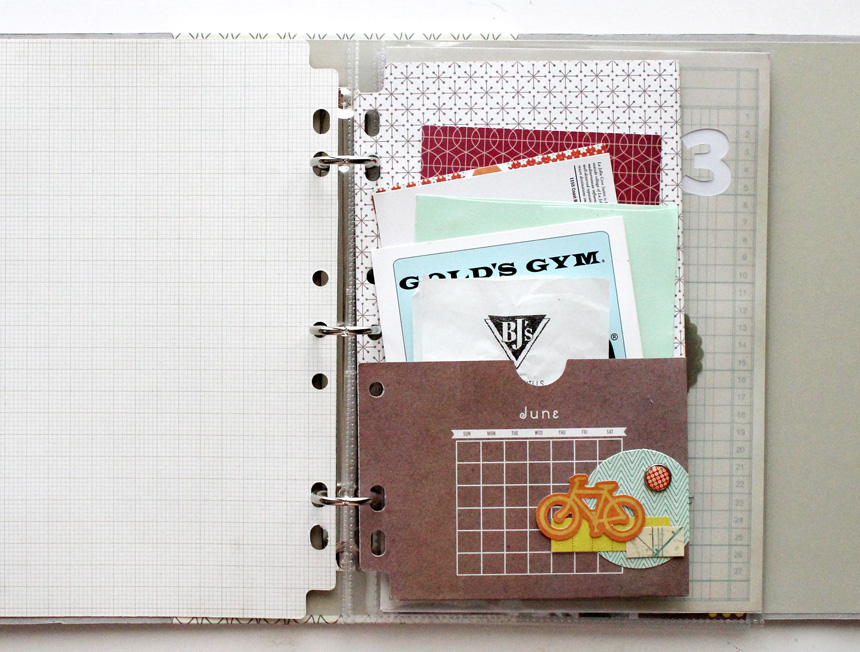
The first page is a calendar pocket that I’ve stuffed a bunch of memorabilia into. Every couple of days, I’ll clean out my purse and remove all of the fun souvenirs that are taking up space (and getting soaked by my water bottles) and immediately tuck them into these folders. Easy peasy.

Ann-Marie Morris

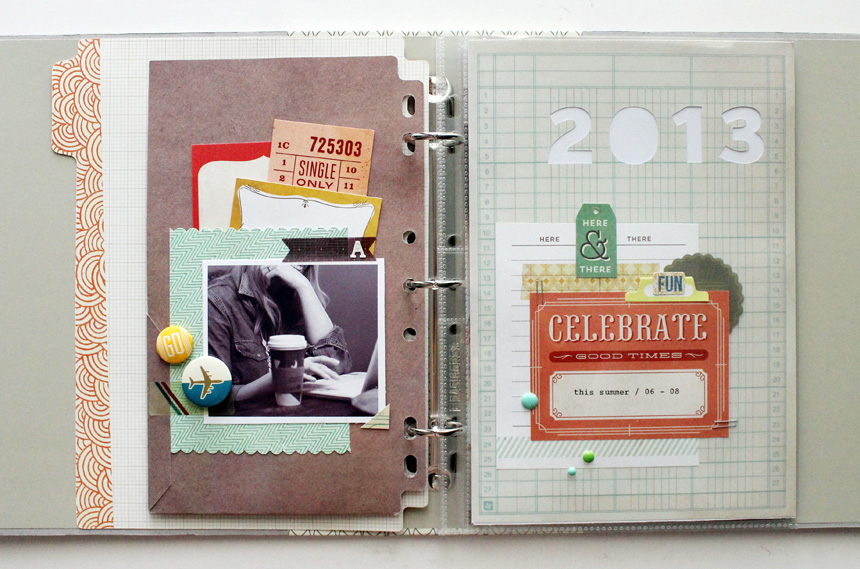
LEFT: I embellished the back of the calendar pocket with a few of my favorite products and a photo of me doing what I do (even if it is from the holiday season, hence the Starbucks red cups – ha!).

RIGHT: I have to tell you that 2013 has been the YEAR for my Cameo die-cutting machine. Not a day goes by that I don’t fire that baby up to work on scrapbook pages, cards, and of course, wedding decor. For this particular page, I ran a sheet of ledger paper through the Cameo to cut out the “2013” and backed it with a white sheet of cardstock for a subtle effect. I then embellished the rest of the page with a handful of Snippets and candy buttons to set the tone for the rest of the album.

Ann-Marie Morris

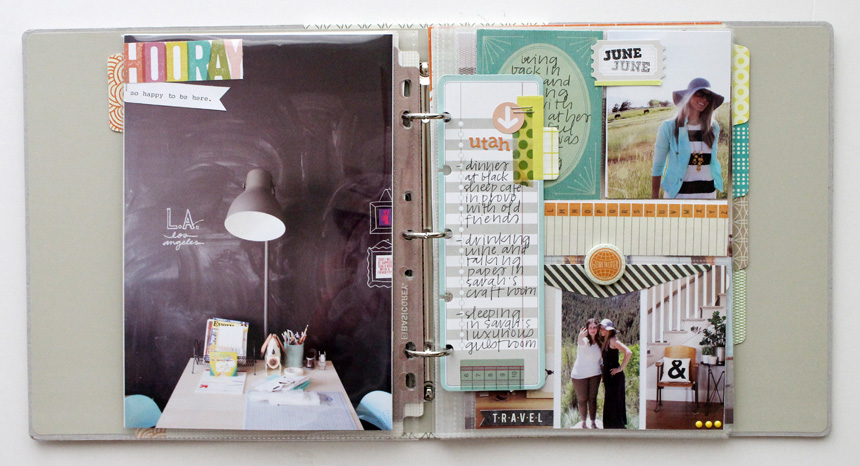
LEFT: I am such a fan of oversized photos paired with minimal embellishments, so the 6.5 x 9.5″ page protector was perfect for this particular week. But let’s be real, I just wanted to stare at Sarah’s amazing home all day long.

RIGHT: To maximize the 4×6″ pocket on the bottom of the page protector, I printed three vertically-oriented photos at 4 x 1.75″ and glued them to a sheet of white cardstock.

Ann-Marie Morris

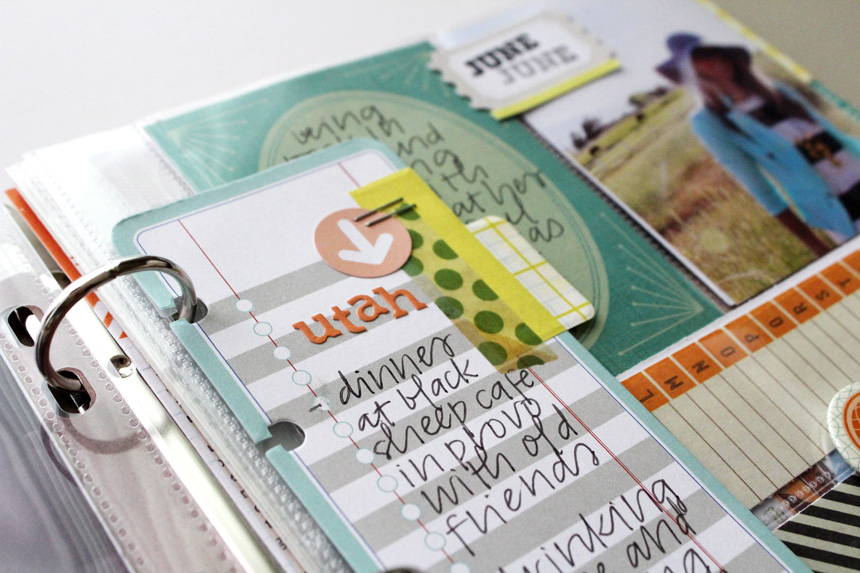
To record the highlights from trip to Utah, I wrote down bullet points on this journaling pad, popped it right into the interlocking rings, and called it GOOD. Now that’s my idea of scrapbooking!

You can read more about my weekly page updates here!

6 Comments

DIY Watercolor Calendar | Ann-Marie Loves Paper

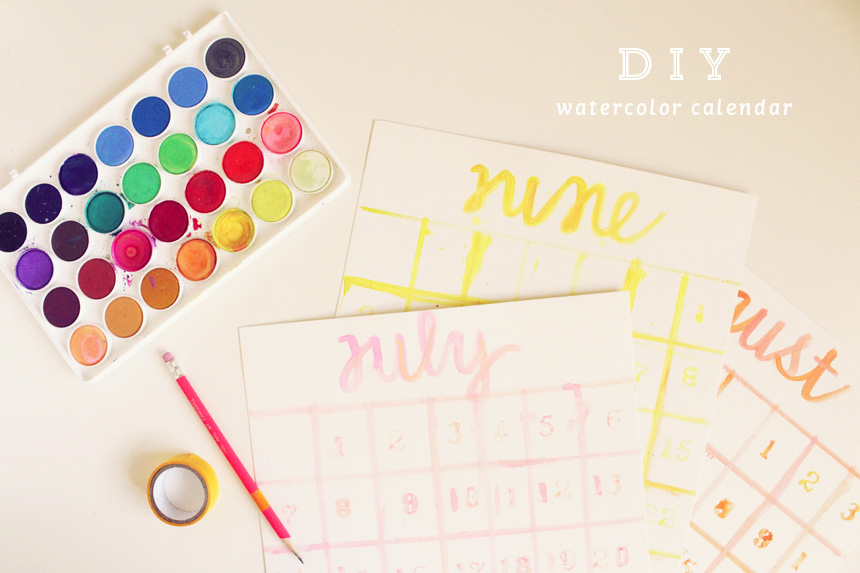
I realize it’s mid-June and to most people, it’s not exactly calendar season. But for me, I just want a change of scenery. Since I can’t write on my Rifle Paper calendar (thou shalt not deface any Rifle products with messy handwriting…everyone knows that), I decided to take matters into my own hands and make my own. Here’s how I did it:

DIY Watercolor Calendar | Ann-Marie Loves Paper

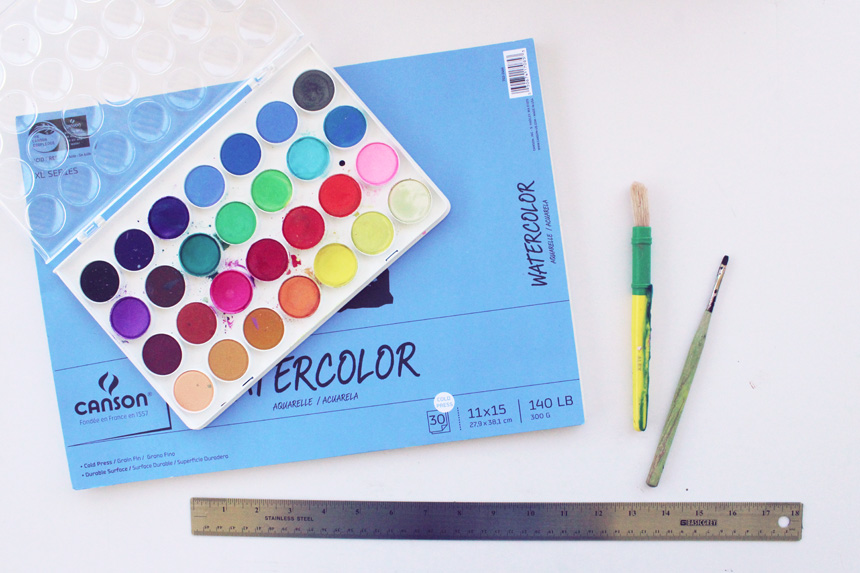
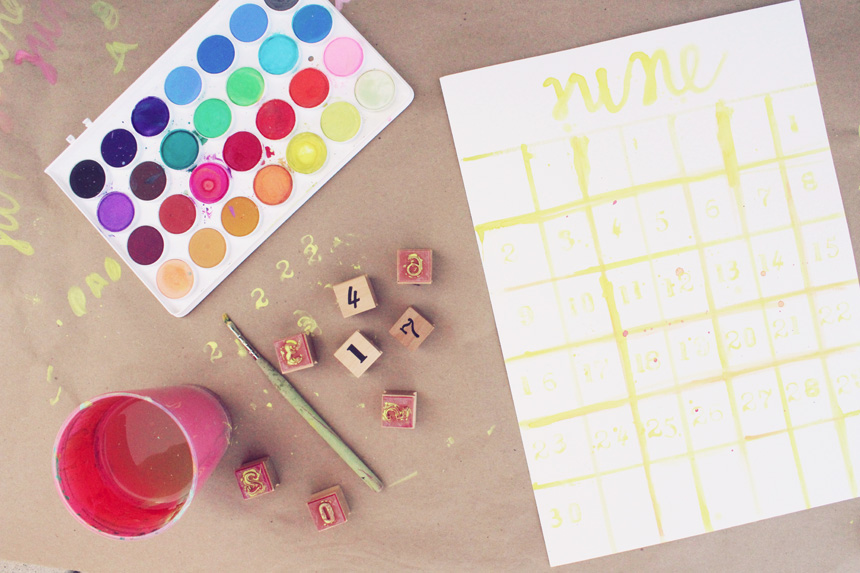
S U P P L I E S

  • Watercolor paper
  • Watercolor paints
  • Ruler
  • Paintbrushes
  • Number stamps (mine are from The Curiosity Shoppe, which sadly appears to be closed!)
  • Cup for water

DIY Watercolor Calendar | Ann-Marie Loves Paper

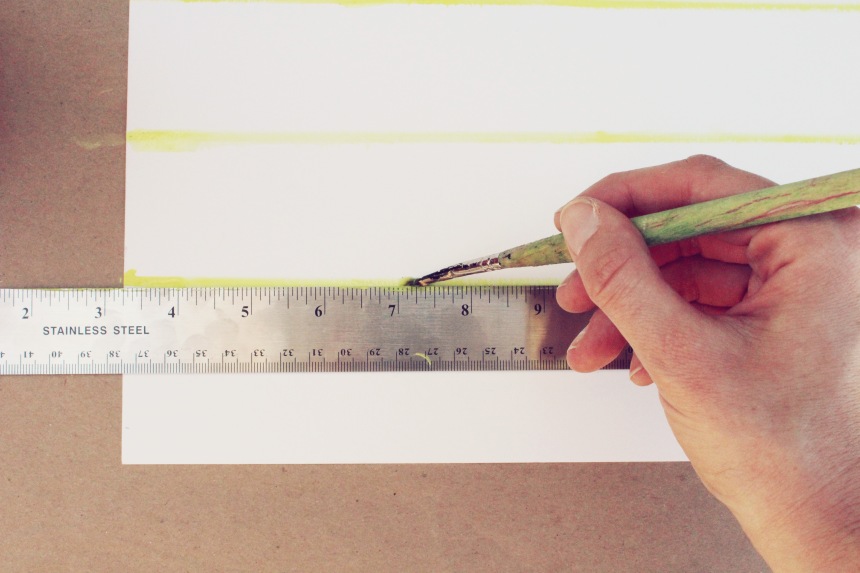
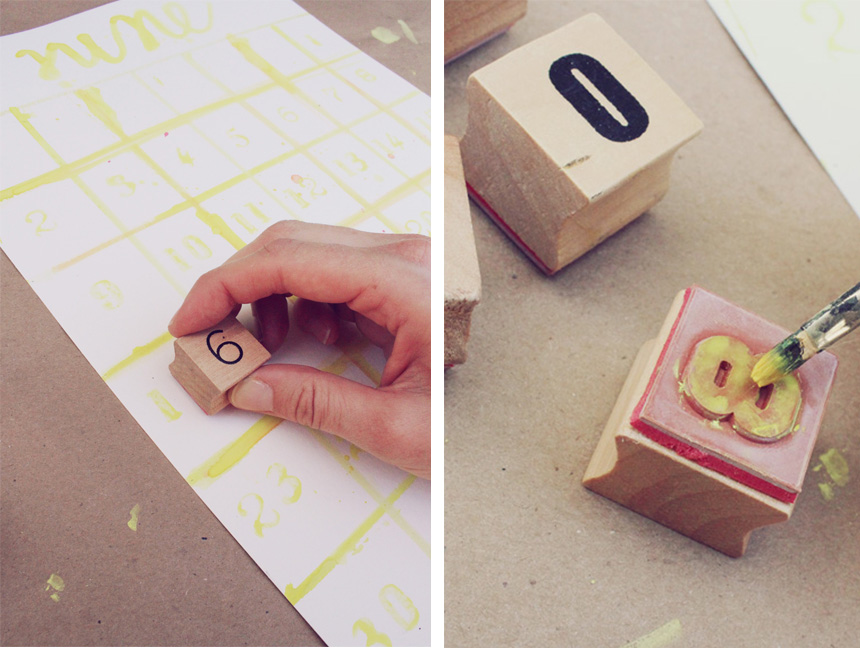
To begin, I (roughly) measured out the lines for my calendar squares and then ran my paintbrush right along the edge of the ruler. I should preface this by saying that I am NOT a perfectionist. I have little interest in making everything look uniform; I just want to have fun creating and get things done. Plus, watercolors don’t exactly lend themselves to clean lines. The more freeform, the better!

DIY Watercolor Calendar | Ann-Marie Loves Paper

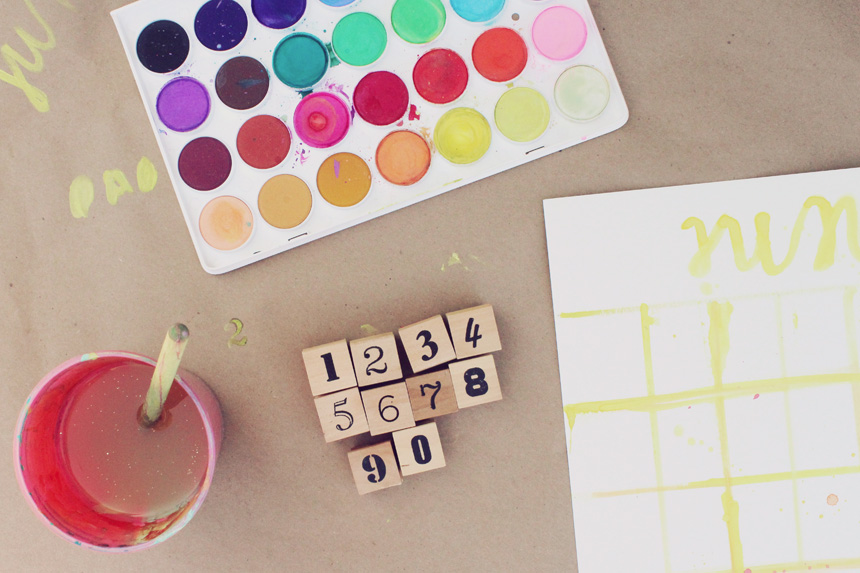
Once I have the lines and month name painted, I gather my number stamps.

DIY Watercolor Calendar | Ann-Marie Loves Paper

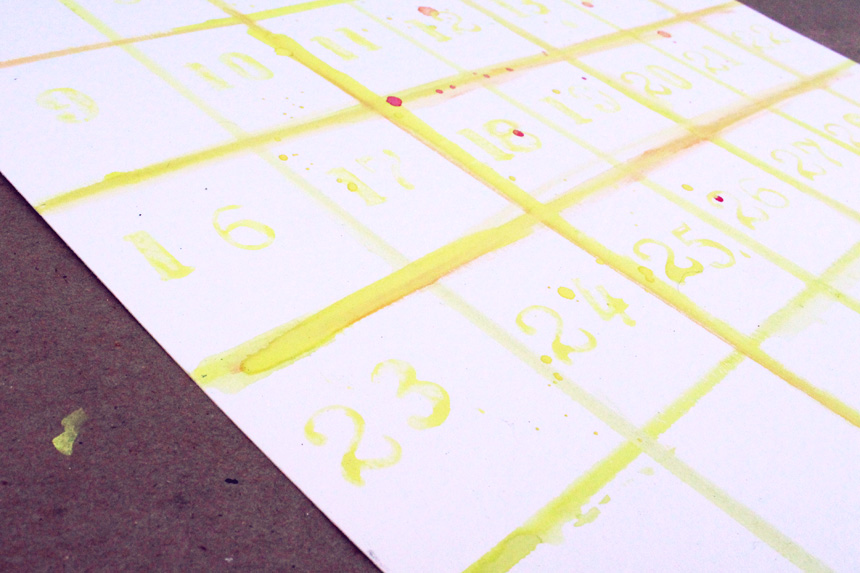
To stamp with watercolors, I simply paint the rubber stamp with the paintbrush and stamp directly onto the paper. Easy peasy.

DIY Watercolor Calendar | Ann-Marie Loves Paper

I decided to go with a light paint color so I can eventually write over the date without competing with the overall design.

DIY Watercolor Calendar | Ann-Marie Loves Paper

Let dry and let the planning begin!

7 Comments

san luis obispo minibook | ann-marie morris

I can’t even tell you how long it’s been since I made a mini book on the road, but after making one again for our SLO trip this past April, I am officially back onboard. As someone who is genetically-programmed to take pictures of ev-er-y-thing and collect every last bit of memorabilia like it’s my job (well, it kind of is), a mini book is an ideal landing spot for all of those treasures. Not only is fun to consciously seek out moments worth remembering, but it’s also a blast to set up shop at a hotel room desk after a long day of exploring + collecting (not as fun: cleaning up said hotel room desk before checking out).

san luis obispo minibook | ann-marie morris

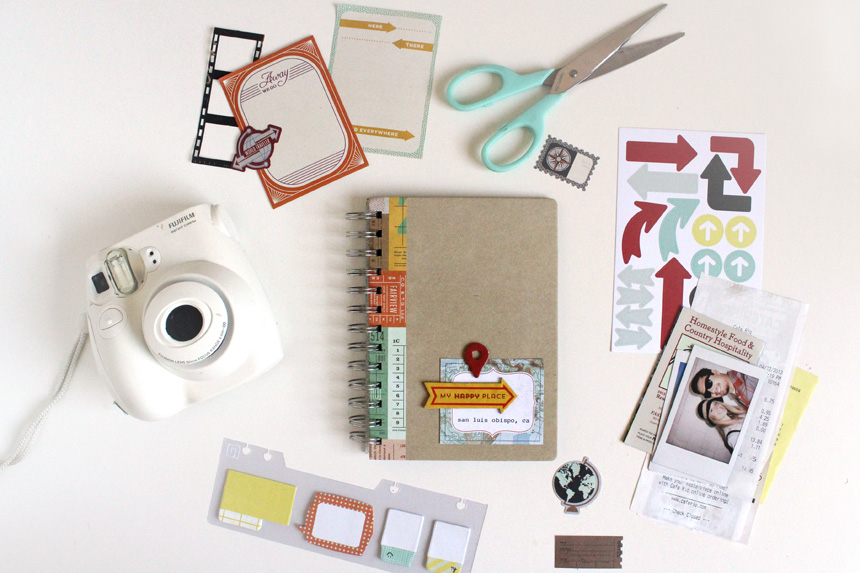
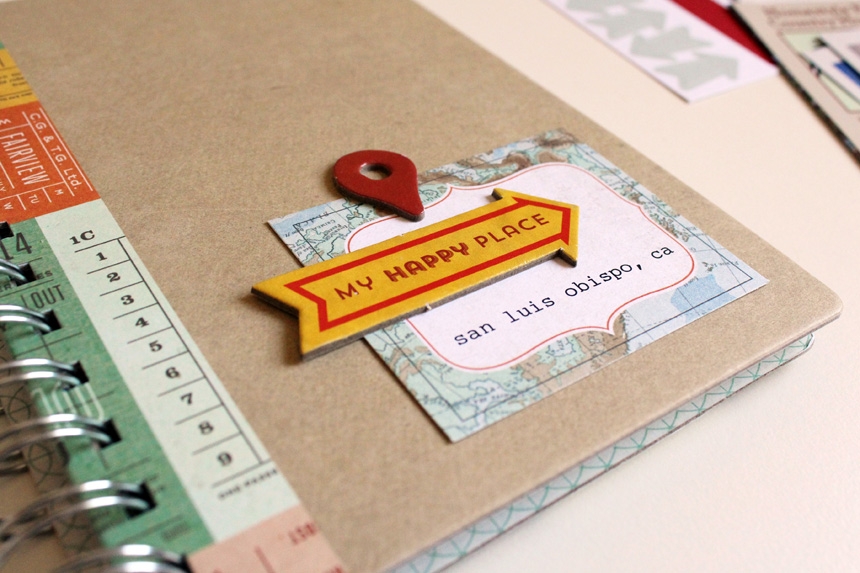
For this trip, I used a Carte Postale 5×7 journal since it was the perfect size for a weekend adventure. Before leaving for SLO, I embellished the cover with a few Carte Postale supplies + my typewriter. Easy enough.

san luis obispo minibook | ann-marie morris

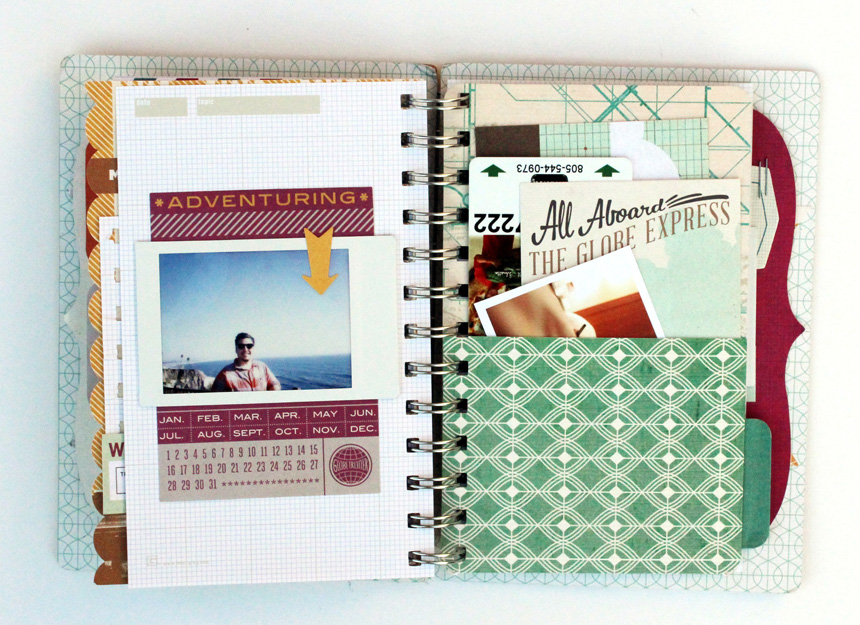
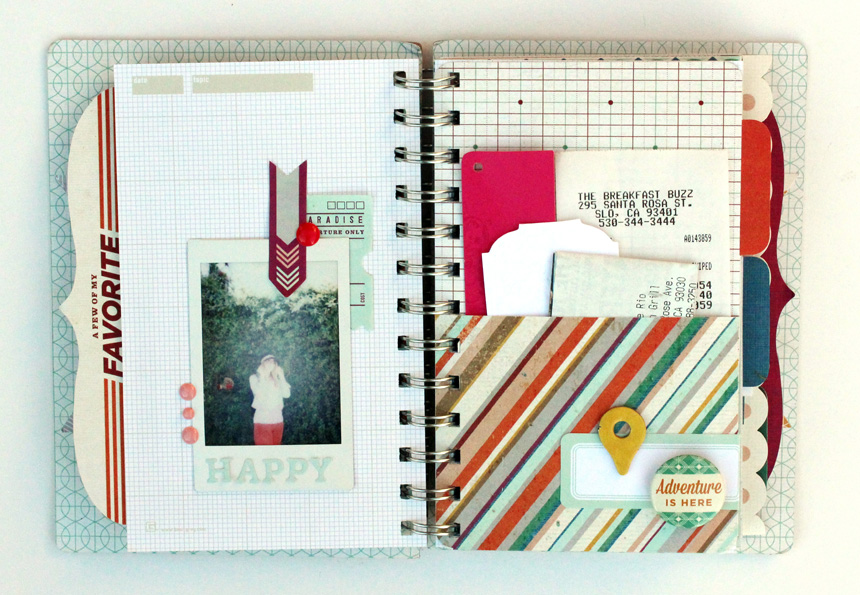
One of the main things that I love about this album is all of the pockets! I love having designated places to house my memorabilia + Instax photos before I figure out where they will permanently end up. Oh! And pockets also make great storage for supplies or scraps that I want to make sure I use on my pages. #pocketsforthewin

san luis obispo minibook | ann-marie morris

I brought this waterfall pack with me because it has everything I need (labels, letters, journaling spots, and die-cuts) all in one nicely-packaged place. This is key if you want to scrap on the road without schlepping your entire craft stash to your destination.

san luis obispo minibook | ann-marie morris

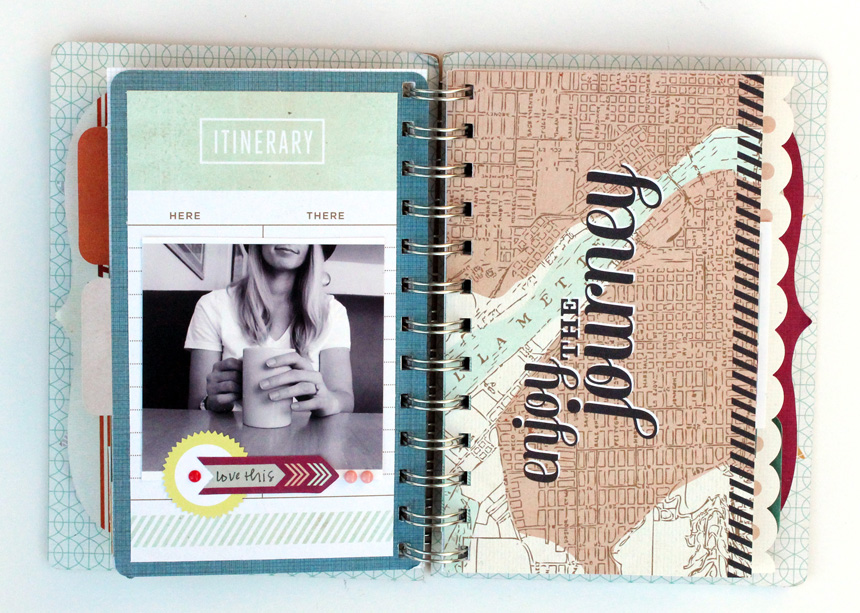
Mini books need not be fancy! I like to keep my pages pretty minimalist partly to avoid too much bulk, but mainly so I can finish the book before I run out creative steam. You know how it goes.

san luis obispo minibook | ann-marie morris

You can read more tips and see additional photos of my book here and here!

3 Comments

DIY Care Package | Ann-Marie Loves Paper

As someone who has lived far away from family + friends, I can attest to how wonderful it is to receive a care package in the mail. My mom used to send me the best care packages filled with magazines, my favorite candy, and the occasional Starbucks gift card (thanks Mom!) to make the distance between California + Utah feel a little bit shorter. And even though I am now back in California, I still have several friends that live out of state, so I am always looking for opportunities to send a little happy mail their way.

DIY Care Package | Ann-Marie Loves Paper

The key to care packages is that they don’t have to cost a lot; it truly is the thought behind the gesture that counts! In fact, one of my favorite things to do is to “shop” my own supplies. I have waaaay more stamps, pencils, twine, washi tape, and envelopes than I’ll ever know what to do with, so I pass them along to someone who can put them to good use! And of course, with all these fun supplies comes the opportunity to create fun packaging. I especially love adding descriptions to my items (i.e. “15 yards”) with Martha Stewart’s Crafts Your Own Stamp Set..

DIY Care Package | Ann-Marie Loves Paper

There are no rules and you don’t even need to send the package to a distant location. It might be fun just to drop a box off on a good friend’s doorstep to make their homecoming a little bit sweeter. Happy mail for the win!

4 Comments

Fleetwood Mac at the Hollywood Bowl | Ann-Marie Morris

Last weekend my mom and I saw Fleetwood Mac live at the Hollywood Bowl. It was AMAZING. Our seats were pretty far back but the great thing about the Bowl is that there really are no bad seats. Even if you’re half a mile away from the stage, you’re still nestled in a canyon overlooking the Hollywood sign and enjoying great music under the stars. So really, no complaints. The concert was spectacular (as expected) and it definitely brought all the hipsters out of the woodwork – ha! You can see my Vines from the show here + here!

BasicGrey Capture | Ann-Marie Morris

I’ve been using a BG Capture album to record all the fun things that have been happening in 2013, and of course, Fleetwood Mac totally earned their spot in my book.

BasicGrey Capture | Ann-Marie Morris

BasicGrey Capture | Ann-Marie Morris

I decided to keep things pretty simple and let the ticket (tucked into the center page protector pocket) do the talking for me. Easy peasy.

1 Comment

I’ve recently come to the rather startling realization that this wedding is going to happen in a few months, whether I like it or not (for the record, I love it). Needless to say, no matter how busy I am, I really need to get cracking on all of the DIY projects I have in mind. So! I’ve decided to tackle the smaller projects first, if for no other reason than the fact it makes me feel like I’m getting a lot done. Baby steps, ya’ll.

fringe flag diy | ann-marie loves paper

This past weekend I whipped out a bunch of fringe flags for all of our guests to wave around as John and I walk back down the aisle. It’s about as low-tech as crafts go, but will (hopefully) pack a big punch in photos! Here’s how I made them:

fringe flag diy | ann-marie loves paper

S U P P L I E S

fringe flag diy | ann-marie loves paper

Decide how long you want your fringe flags to be and cut a sheet of tissue paper accordingly. I folded my sheet in thirds and kept it folded while I fringed the ends.

fringe flag diy | ann-marie loves paper

Fold each sheet of fringed tissue paper in half lengthwise a few times until it is in a tight bundle.

fringe flag diy | ann-marie loves paper

Roll the tip of the dowel in a large Glue Dot.

fringe flag diy | ann-marie loves paper

Wrap the base of the fringe tissue paper around the adhesive until is completely wound (I went with Glue Dots, but hot glue would work just as well.)

fringe flag diy | ann-marie loves paper

While holding the fringe tissue paper to the dowel, wrap a strip of washi tape around the base of the tissue paper until it is completely secure. If the fringe is too tight, tousle it with your fingers a bit to loosen it up. Finally, wave your fringe flag around like you just don’t care!

One wedding craft down, five hundred more to go!

To see this DIY in action, check out my Vine video here!

6 Comments

DIY Muffin Tin Planter | Ann-Marie Loves Paper

The other day as I was browsing the shelves of the Goodwill, I spotted this muffin tin + knew instantly that I wanted to turn it into a planter. Once I picked up the muffin tin for $1.50 (50% day – look out!), I swung by Lowes and had a wonderful time picking + choosing my succulents.

Click here to see my Vine video of the planting process!

DIY Muffin Tin Planter | Ann-Marie Loves Paper

To create this planter, you will need:

  • Six succulent plants (I purchased all of mine for less than eight dollars at Lowes)
  • 1 muffin tin (the deeper the cups, the better)
  • Vinyl Bumpers
  • An awl or drill (and drill bit)

DIY Muffin Tin Planter | Ann-Marie Loves Paper

After cleaning the muffin tin as best I could (a good rule of thumb for all thrift finds), I flipped it over and punched drainage holes in all six of the cups using a bookbinding awl. Luckily the tin was super easy to punch through, but if yours is thick, I recommend using a drill with a small bit.

DIY Muffin Tin Planter | Ann-Marie Loves Paper

From there, I added a vinyl bumper to each of the four corners of the tin to allow for proper drainage. This is key if you prefer living plants.

DIY Muffin Tin Planter | Ann-Marie Loves Paper

I then played around with the arrangement of the succulents and placed them in the muffin tin.

DIY Muffin Tin Planter | Ann-Marie Loves Paper

Then I began moving the soil around, adding in a handful of small rocks, and finessing each of the plants to my liking. After that I lightly watered the individual plants and called it good. The thing to remember about succulents is that they require minimal watering. In fact, it’s best if you leave them alone until their soil is completely dry. (You can read even more care + keeping tips here!)

DIY Muffin Tin Planter | Ann-Marie Loves Paper

So there you have it! A quick + easy Springtime DIY that has yet again fueled my thrift shopping habit! I have plans to make a bunch of these for my wedding and display them amidst other floral centerpieces on our tables. Good times ahead!

5 Comments

Everyday Storyteller 2

Welcome to the Everyday Storyteller Vol. 2 blog hop! I can’t believe we are just a few short days away from the big reveal – so exciting! I’m still feeling incredibly honored to have my projects featured alongside such a talented and diverse group of women! In case you’re just getting up to speed, Everyday Storyteller Vol. 2 is a brand new idea book offering more than 100 tips, tricks and techniques for scrapbooking. Go behind the scenes with 33 of your favorite memory keepers to see how they capture moments, tell stories and document their best memories. Sign up for the VIP list right here to be the first to know when the book is released and receive an exclusive discount!

Each book contributor participating in the blog hop is giving away an eBook copy of Everyday Storyteller Vol. 2. Use this entry link to complete your entry form. You must enter by 11:59pm PDT on April 30, 2013 to be eligible. You may enter from each stop. Winners will be contacted directly as well as posted at everydaystoryteller.com on May 1, 2013. Good luck!

Tangie Baxter | Kerri Bradford | Joscelyne Cutchens | Catherine Davis | Patty Debowski | Lisa Dickinson | Karla Dudley | Leah Farquharson | Karen Grunberg | Jenni Hufford | Donna Jannuzzi | Amanda Jones | Mandy Koeppen | Riikka Kovasin | Kami Leonard | Amy Mallory | Amy Martin | Celine Navarro | Lynnette Penacho | Kelly Purkey | Krista Sahlin | Linda Sattgast | Cindy Schneider | Wendy Smedley | Elisha Snow | Amy Sorensen | Neisha Sykes | Jill Sprott | Laura Vegas | Allison Waken | Crystal Wilkerson | Jennifer Wilson

5 Comments

Lately I’ve been going through a major “interneting” phase. You know, the kind of phase where you all you want to do is catch up on all your favorite blogs, pin a million images, and discover new places to get inspired? I love when this happens. It makes me feel like the time I am already going to spend on the internet is actually being put to good use! (At least that’s what I tell myself.) Sometimes just looking at my pins is enough to get my creative juices flowing, but other times, I want to put my visual finds to work…

Ann-Marie Morris

Hence: Blueprints! Every Friday on the BasicGrey blog, I (or a talented guest designer) interpret a non-scrapbook related image through paper and glue. It’s very similar to traditional scrapbook sketches, but with a modern, real-world application that will help you to think outside the proverbial box. And the best part of all? You can download each Blueprint as a PDF to reference when you sit down to create! (Ugh, I love technology way too much.)

So as it turns out, I now have to dedicate a little extra time on Pinterest each week to gathering inspiration…geez, just twist my arm already (;

1 Comment